How to Manage Unplanned Visits: A Step-by-Step Guide
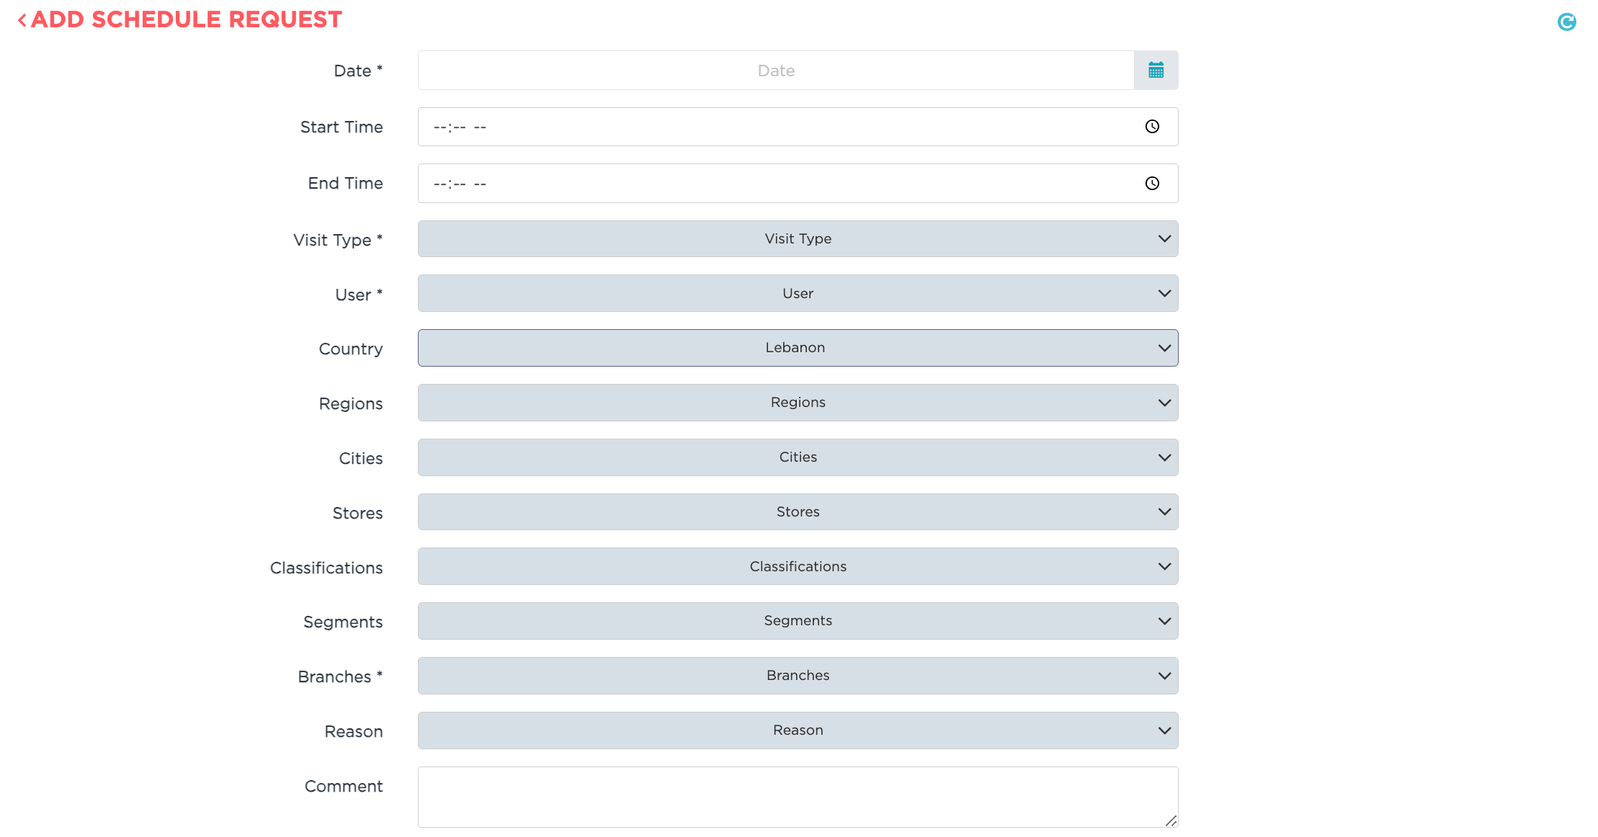
This guide will help you effectively manage unplanned visits that occur outside of regular schedules. Admins can initiate requests for these visits by specifying the visit type, reason, start and end times, and the assigned field representative. Each request is then routed for approval to ensure optimal scheduling and smoother operations for your team.
Unplanned visits require structure. Let's first define visit types and reasons for smoother processing.
Visit Type Setup
🎯 Objective
Designate each visit type as planned or unplanned, and define specific reasons for each type to provide clarity and organization.
📘 Instructions
Navigate to the Visit Type tab located under Setup → Company.
Planned vs. Unplanned: Identify each visit type as planned or unplanned for clear categorization.
Define reasons: Click on the settings icon next to each visit type to access and define reasons specific to that visit type, providing context for your team.

Once you've set your visit types and reasons, you can streamline the unplanned visit request process through the dedicated Schedule Requests page.
Dedicated Schedule Requests Page
🎯 Objective
Simplify the process of scheduling unplanned visits for your field reps through a dedicated Schedule Requests page.
📘 Instructions
Navigate to the Schedule Requests page under the Activity section.
Assign a visit type: Select the appropriate visit type for the specific branch.
Set a timeframe: Define clear start and end times for the visit.
Assign a field rep: Choose the best field rep for the task.
Reason for visit: Pick a predefined Reason from the options you defined for the chosen visit type.
Optional comment: Include additional details if needed.
Submit the request: Click Save to initiate the approval process.


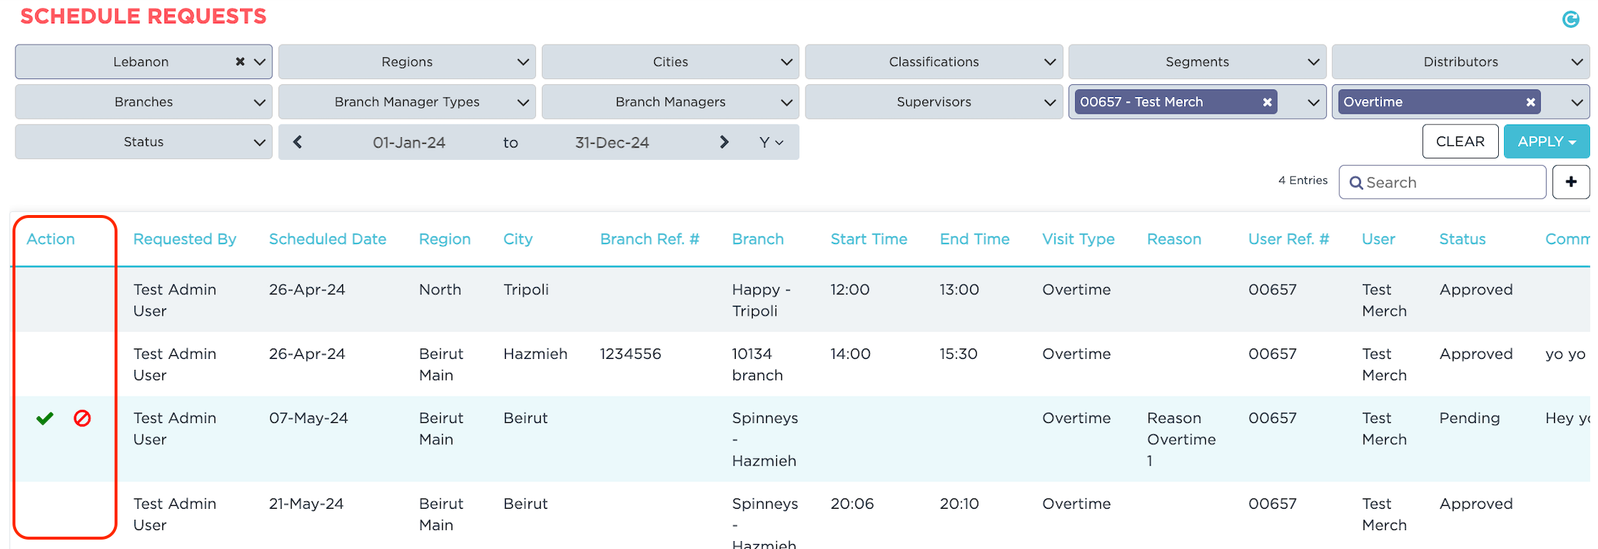
After a supervisor submits a visit request through the Schedule Requests page, it enters the approval process to ensure it aligns with your team's schedule.
Approval Process
🎯 Objective
Manage the approval of schedule requests to ensure optimal scheduling and coordination.
📘 Instructions
Submit the request: Once a schedule request is created, it will be routed for approval.
Approve or reject requests: Review and approve or reject the request. A security tag manages access to this functionality.
Automatic calendar update: Upon approval, the visit will be automatically added to the field rep's calendar, and the request status will be updated.
Edit pending requests: Requests can still be edited as long as their status remains Pending.


Following the approval process, you can further optimize unplanned visits by enabling bypass restrictions within the app, allowing reps to focus on the visit itself while maintaining GPS verification.
Streamlined App Usage
🎯 Objective
Enhance the efficiency of unplanned visits by simplifying in-store requirements while maintaining GPS verification.
📘 Instructions
Enable bypass restrictions: During Visit Type setup, tick the Bypass Restrictions checkbox to allow field reps to skip in-store activities during unplanned visits.
GPS verification: Location verification remains crucial, ensuring visits occur at the designated branch.

