How to Use the Planogram Module
Planogram Module
🎯 Objective
The Planogram module is designed to help ensure that store shelves and displays follow the approved planogram standards. Its main goal is to verify that products are placed in the correct locations, in the right quantities, and with proper visibility, as defined by the company’s merchandising guidelines.
📘 Instructions
Step 1: Enable the Module
Ensure the Planogram module is enabled in the Access Rights.
Next, provide access to admins and field reps’ accounts to the module from Access Rights > Groups.
Portal Level: Enable for admins.
Mobile App Level: Enable for field reps.
Step 2: Configure the Module
Go to the Merchandiser page, click on the Planogram tab in the left-hand menu to reveal the sub-menu, and click Setup.
Setup the Reason:
Click on the Reason tab.
Click on the + button
Fill in the required details.
Define the reasons of Non Compliance and the conditions of the Compliant planograms.
Setup the Questions:
Click on the Questions Library tab.
Under Question Template, click on Add next to the question that you need.
Fill in the required details related to the added question.
The question will be added in the Questions Library section which can be used when creating a planogram.
For a better compliance measurement, you can add the planogram rules as yes/no questions using our questions template or customized ones which will be used to measure the overall planogram compliance
Add the Planogram:
Click on the Planogram tab.
To add manually:
Click on the + button.
Fill in the required details.
To add in bulk:
Click on the upload button.
Select Add.
Download the template.
Fill in the required information.
Upload the file.
Select Add Missing Data if you’re adding additional items or Replace All if you need to delete all previously uploaded items and add the new ones from the uploaded sheet.
To add images in bulk:
Click on the Image upload button
select the Zip folder which contains the planogram images.
The Planogram Images should be named as PlanogramReference_Number
Add Questions to the Planogram:
Click on the defined Planogram:
Assign a Predefined questions from the Questions Library or Create a new Question.
Assign a Weight by clicking on the number next to each Question.
Define the Threshold Percentage required to consider the planogram as Compliant.
6. Assigning Planograms to specific Branches or Stores
Click on the Branch Tab.
To add manually:
Click on the + button.
Select the Planogram.
Select the Branch, Store, or Store Group as needed
To add in bulk:
Click on the upload button.
Select Add.
Download the template.
Fill in the required information.
Upload the file.
Select Add Missing Data if you’re adding additional items or Replace All if you need to delete all previously uploaded items and add the new ones from the uploaded sheet.
7. To Duplicate a Planogram:
Under Planogram tab, click on the duplicate button.
Define the new Planogram Name and Reference number.
Duplicating a Planogram will also copy the Images and the assigned branch of the original Planogram.
Mobile App Configuration
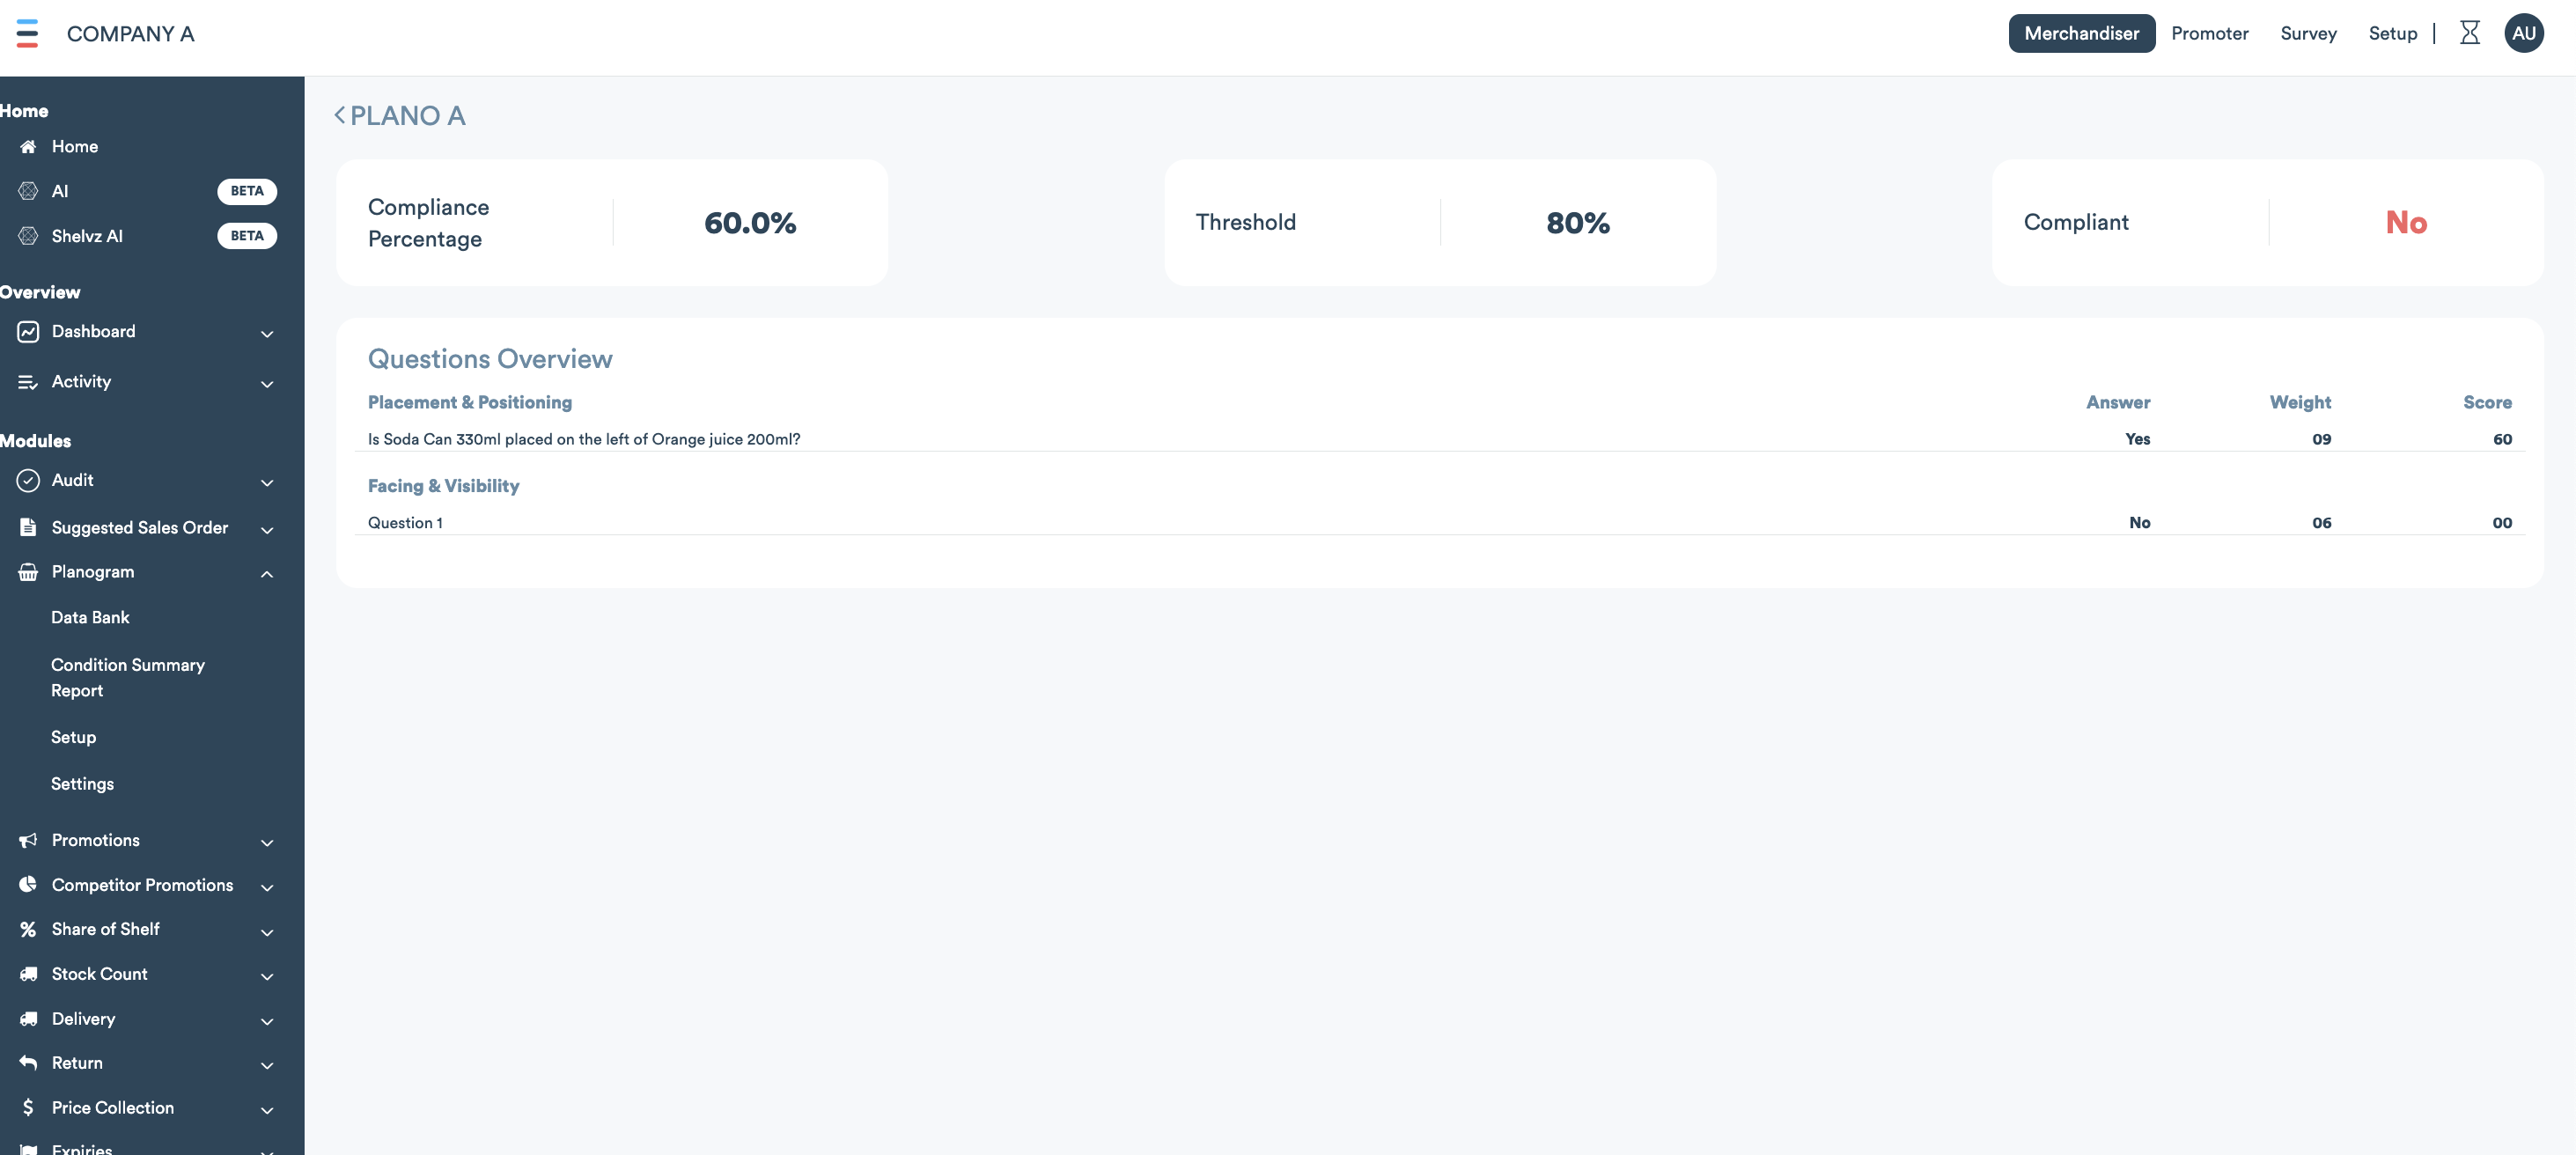
Field reps can access the Planogram module under the Audit section. After selecting the relevant filters, they will see the list of available planograms for that store.
Tapping on a planogram opens its details. Field reps can click on the reference image to review how the shelf should look and check if the current display is compliant. They can then take a photo of the actual shelf and answer the questions shown underneath.
Once the planogram is fully completed, the indicator next to it will change from red to blue, confirming that the task has been completed properly.
Step 4: Accessing the Reports
Under the Planogram Module, click on the report name
Data Bank: a detailed report displaying the audited data in the visit along with the corresponding questions and their weights.

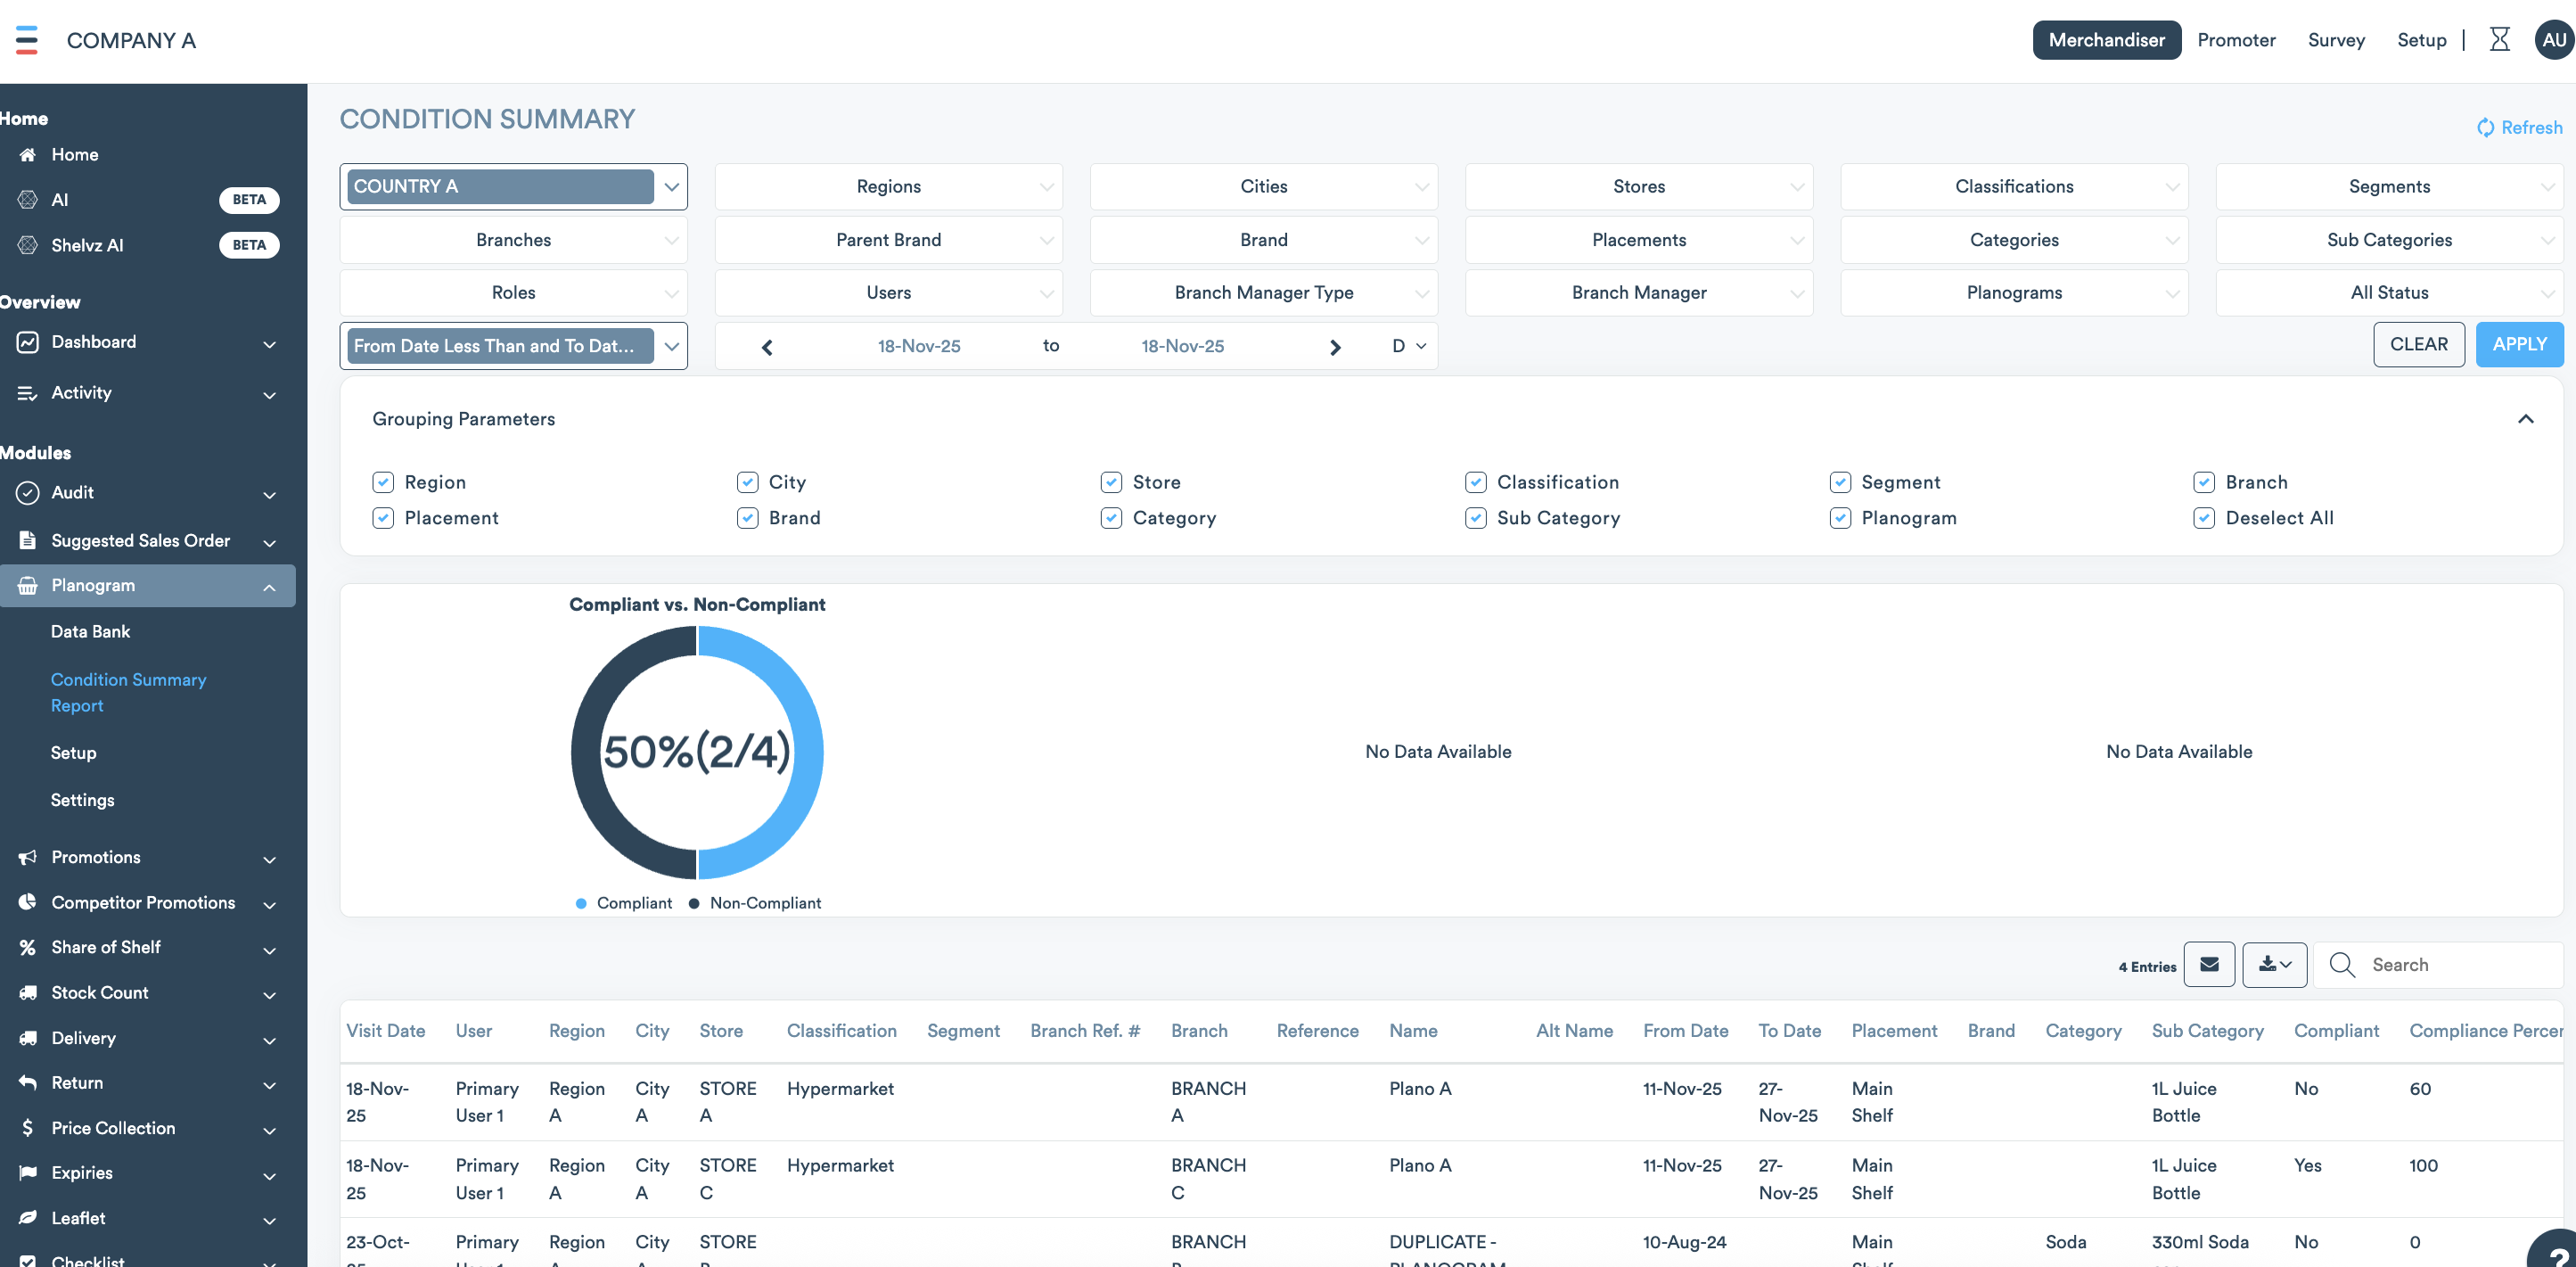
b. Condition Summary Report: a report that displays the conditional summary along with the compliance percentages.
Field Descriptions
Field Name | Description |
|---|---|
Name | Define a unique name for the Planogram |
Reference | Define a unique reference number for the Planogram. |
Required Planogram | Specify if it is mandatory to audit the Planogram before submitting the visit. |
Image Audit Not Required | Specify if it is mandatory to take an image when auditing a Planogram |
Active | Specify if the Planogram is active or not |
Assignments | Define where the Planogram is found |
Start/End Date | Define the Start and End date of the Planogram |
Attachment | Upload Images for the planogram |